Actions
Part 1
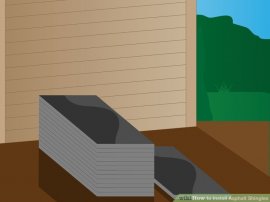
Organizing the Roof- Obtain the right quantity of shingles for the job. It generally takes three packages of shingles to pay for 100 square feet (9.29 square meters). Asphalt shingle "bundles" are actually sealed in packages (the expression bundle originates from wood shingles which in fact emerged tangled up with wire in packages). Measure your roof and purchase appropriately.
- Gauge the length and width associated with the specific parts of the roofing, multiplying all of them collectively to look for the location. Include areas of every area together, then divide by 100 to get the correct range squares. Boost this number by 3 to get the amount of bundles you'll want to buy.
- Measure the period of a shingle as it lies throughout the roofing. This can help regulate how the shingles will lay on the roofing width. Many asphalt shingles tend to be 3 feet (91.4 centimeters) in length.
 in case the roofing's width is not an even several associated with shingle's length, you'll have a partial piece on a single end of each line.
- Underneath line of shingles must hang past the side of the roof. For a timber shingle roof might need certainly to slice the shingles that go regarding the advantage to generate a straight range to support this.
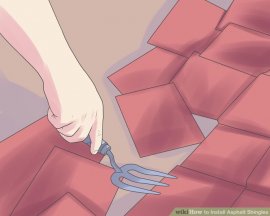
- Eliminate old shingles and flashing. Begin removing the shingles on top farthest from the rubbish container, or the spot you intend to gather the shingles in. Use a yard fork or a roofing shovel to pull them down quickly, make use of the hammer-method and go-by hand for a far more comprehensive task.
- Pry up the nails and loosening the ridge limits. It is okay unless you get all of the nails to start with, because you'll have an opportunity to return back through and remove all of them later on.
- Get rid of the material blinking around chimneys, ports, and valleys in roofing. Blinking in valleys will more often than not be trashed, especially.
 Some roofers keeps a few of the pulsating that's who is fit, but it is probably well worth junking it all when you've got the chance.
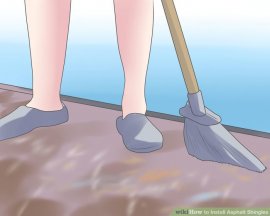
- Cleanse the roofing. Sweep the roof as clean that you can. Pull nails that didn't arise earlier in the day. Reattach loose panels within the sheathing. Examine the sheathing for harm and rotted boards, changing the wrecked parts.
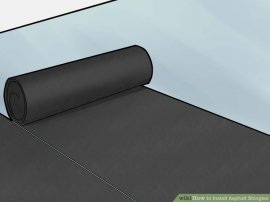
- Install underlayment and new flashing. Lay asphalt, felt-paper, or special waterproof underlayment, across roofing. Some roofers use 15-pound (6.8 kg) roofing paper, which can be a successful strategy. Be nice aided by the staples while affixing the report into the roof-deck.
 usage "tin limits" under staples, if the roofing is subjected to breeze before shingles should be applied.
- Use gluey straight back ice and water shield as underlayment where ice dams or leaf and twig dams will likely establish, as well as valleys and where in fact the roofing stops at a wall (broad metal pulsating may also be used truth be told there).
- Install brand-new flashing. Nail material blinking known as "drip advantage" over the exterior edges for the roof deck.
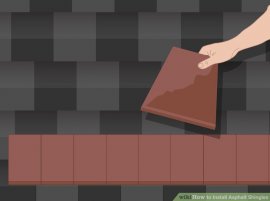
- Pick the type of starter program you will make use of. You need to use slim tab-less beginner shingles if you purchased some (GAF Pro-Start is just one such brand), or may be cutting yours beginner shingles to match the project. Some people want to simply get one number of shingle and cut all of them to suit, although some choose the ease of the pre-cut beginner shingles without tabs.
- Usage chalk outlines to help make helpful tips on your own. With respect to the type of shingles you are utilizing and the roof you are working on, you may have to establishing a chalk guide starting 7 ins (17.8cm) from the bottom roof advantage. In either case the glue strip of the beginner program is then placed across the drip edge, as well as the rake sides aswell.
- Mark through the left to correct edge of the roof therefore the chalk range should be seen straight away above each program as a guideline. Continue to chalk additional directions in line with the width associated with shingle through about four classes (rows) over the roofing.


Source: www.wikihow.com
Share this Post
latest post
-
 Equipment used in Building Construction April 5, 2024
 -
 Roller Equipment March 16, 2024
 -
 Construction Equipment and Their Uses February 25, 2024
 -
 What is Heavy Equipment? February 5, 2024
 -
 Construction Equipment Logo January 15, 2024
 -
 Equipment used in Construction site December 26, 2023
 -
 Construction site Equipment December 6, 2023
 -
 Definition of Heavy Equipment November 16, 2023
 -
 Types of Construction Equipment and Their Uses October 27, 2023